
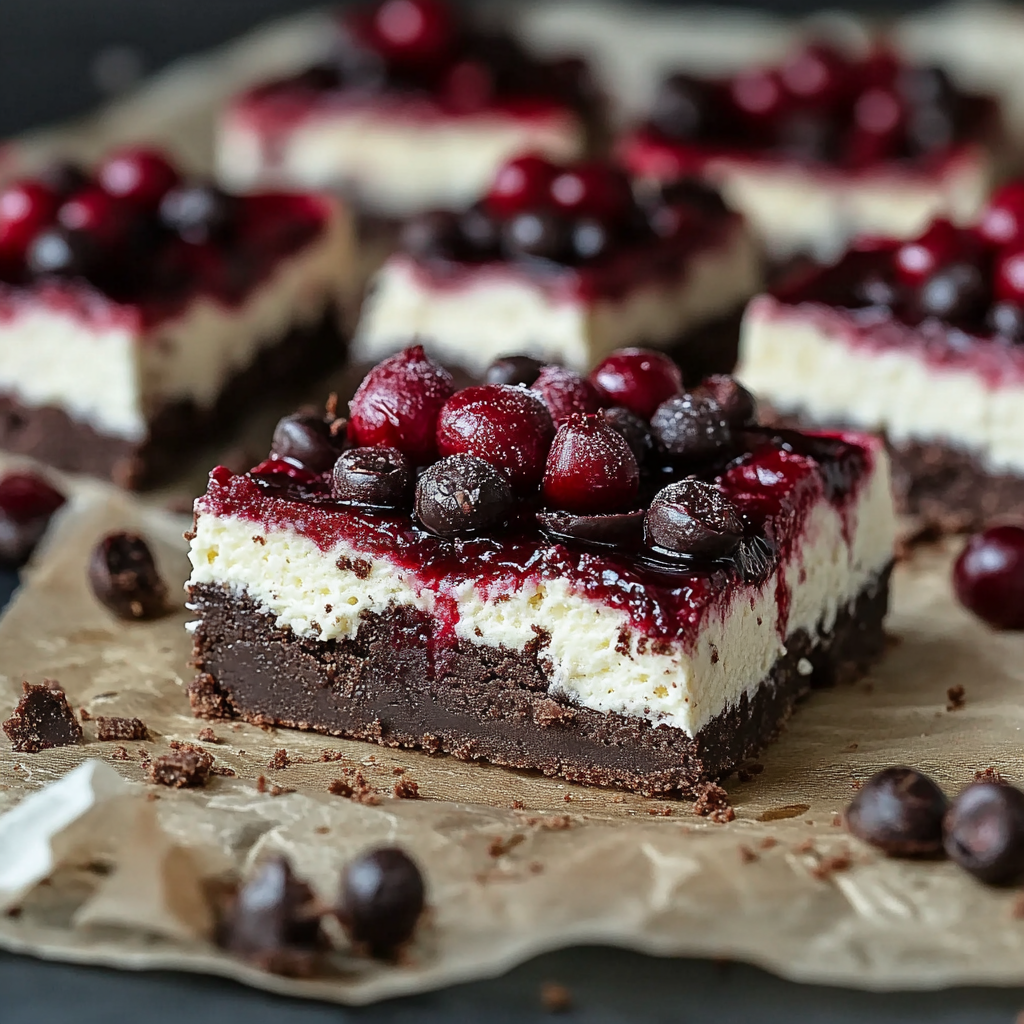
If you love the rich, decadent flavors of chocolate and cherries, these Black Forest Cheesecake Bars are your next must-bake treat. They combine a fudgy chocolate cookie crust, a silky vanilla cheesecake layer, and a topping of sweet cherry pie filling for a dessert that’s both beautiful and incredibly satisfying. Perfect for holidays, potlucks, or a sweet weekend indulgence.
Why You’ll Love This Recipe
- Decadent Flavor: The combination of chocolate and cherry creates an irresistible taste experience.
- Easy to Make: With straightforward steps, these bars come together quickly, making baking fun and stress-free.
- Versatile Dessert: Ideal for various occasions like parties, family gatherings, or simply as a delicious treat at home.
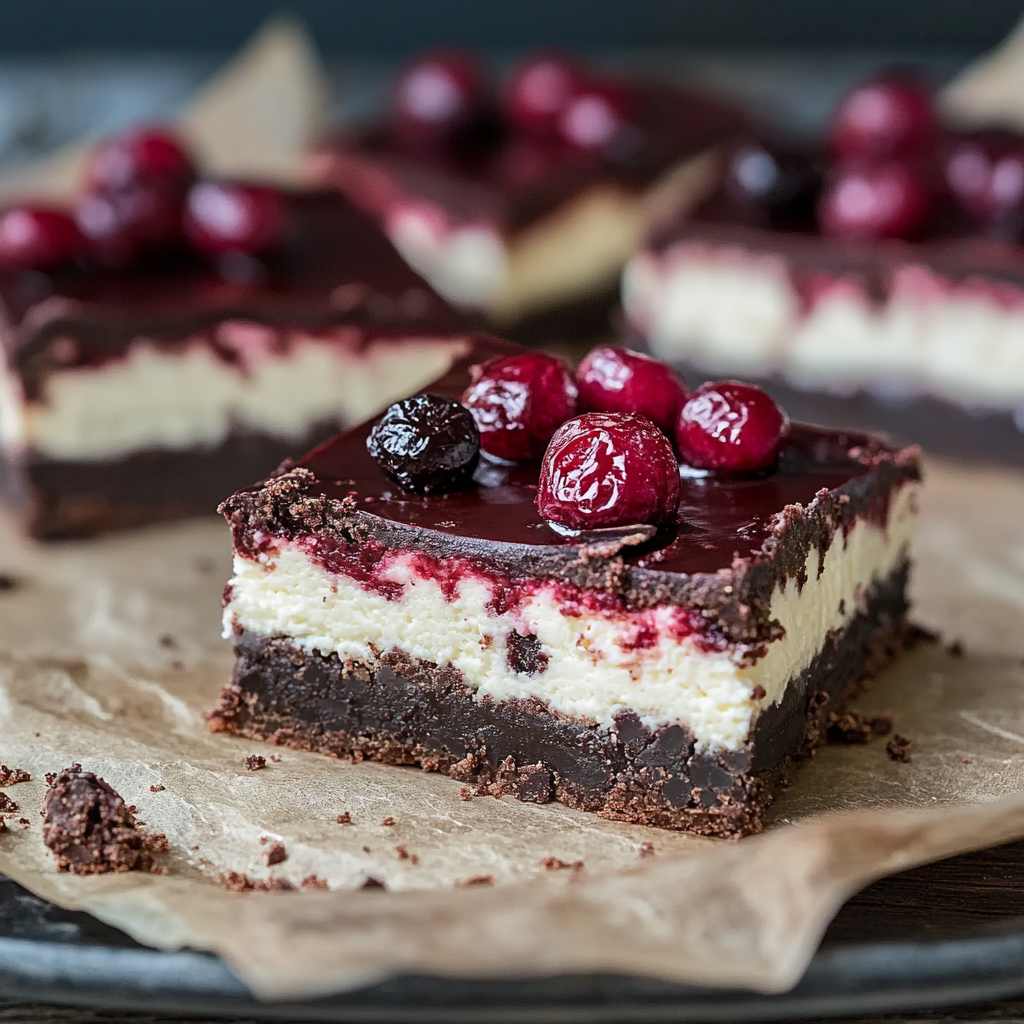
- Beautiful Presentation: The layers of cheesecake and cherry topping make for an eye-catching dessert that impresses guests.
- Customizable Toppings: Feel free to add dark chocolate shavings or whipped cream for extra flair.
Tools and Preparation
To create these delightful Black Forest Cheesecake Bars, you’ll need some essential kitchen tools. Having the right equipment makes the process smoother and more enjoyable.
Essential Tools and Equipment
- 9-inch square baking pan
- Mixing bowls
- Electric mixer
- Rubber spatula
- Parchment paper
Importance of Each Tool
- Electric mixer: Ensures that your cream cheese is perfectly smooth, which is key to a luscious cheesecake texture.
- Rubber spatula: Helps in folding ingredients gently without deflating the mixture while ensuring everything is well combined.
Ingredients
For these Black Forest Cheesecake Bars, gather the following ingredients:
For the Crust
- 1 ½ cups chocolate cookie crumbs (such as Oreo, without filling)
- ¼ cup unsalted butter, melted
- 2 tbsp granulated sugar
For the Cheesecake Filling
- 16 oz cream cheese, softened
- ½ cup granulated sugar
- 2 large eggs
- 1 tsp vanilla extract
- ¼ cup sour cream (for a creamy texture)
- Pinch of salt
For the Topping
- 1 can (21 oz) cherry pie filling
- Optional: dark chocolate shavings or curls for garnish
- Optional: whipped cream for serving
How to Make Black Forest Cheesecake Bars
Step 1: Preheat the Oven
Preheat your oven to 325°F (160°C). This ensures that your cheesecake bakes evenly from the start.
Step 2: Prepare the Baking Pan
Line a square baking pan with parchment paper, leaving some overhang on the sides. This will help you lift out the bars later for easy cutting.
Step 3: Make the Crust
- In a mixing bowl, combine chocolate cookie crumbs with melted butter and granulated sugar.
- Mix until well combined; it should resemble wet sand.
- Press this mixture firmly into the bottom of the prepared baking pan.
Step 4: Prepare the Cheesecake Filling
- In another bowl, beat softened cream cheese until smooth using an electric mixer.
- Gradually add in granulated sugar and mix until creamy.
- Add eggs one at a time, mixing well after each addition.
- Stir in vanilla extract, sour cream, and salt until fully blended.
Step 5: Assemble and Bake
- Pour the cheesecake mixture over the crust in the baking pan.
- Bake in preheated oven for about 30-35 minutes or until set but slightly jiggly in the center.
- Remove from oven and let cool completely before adding cherry topping.
Step 6: Top with Cherry Filling
Spread cherry pie filling evenly over cooled cheesecake. Refrigerate for at least two hours before slicing into bars.
Enjoy these delicious Black Forest Cheesecake Bars as a perfect blend of flavors that will delight your taste buds!
How to Serve Black Forest Cheesecake Bars
These Black Forest Cheesecake Bars are a delightful dessert that can be enjoyed in various ways. Whether you’re hosting a party or just indulging at home, here are some serving suggestions to enhance your experience.
Classic Presentation
- Serve the cheesecake bars chilled, dusted with powdered sugar for a touch of elegance.
- Pair with fresh cherries or a few extra chocolate shavings on top for added flavor and visual appeal.
Whipped Cream Delight
- Add a generous dollop of whipped cream on each bar before serving. This will create a rich contrast to the creamy cheesecake and tart cherry filling.
Ice Cream Pairing
- Serve alongside a scoop of vanilla or chocolate ice cream for an indulgent treat that balances the flavors beautifully.
Chocolate Sauce Drizzle
- Drizzle warm chocolate sauce over the cheesecake bars for an extra layer of sweetness and richness.
Festive Garnish
- Top with mint leaves or edible flowers to add color and freshness, making your dessert look even more inviting.
How to Perfect Black Forest Cheesecake Bars
To ensure your Black Forest Cheesecake Bars turn out perfectly every time, consider these helpful tips.
- Use room temperature ingredients: Make sure your cream cheese and eggs are at room temperature. This helps achieve a smooth batter without lumps.
- Don’t overmix: Mix the cheesecake batter until just combined. Overmixing can introduce air, leading to cracks during baking.
- Bake in a water bath: For a creamier texture, place your baking pan in a larger pan filled with water while it bakes. This adds moisture and prevents cracks.
- Cool gradually: After baking, let the bars cool in the oven with the door slightly open before transferring them to the fridge. This helps prevent sudden temperature changes that can cause cracks.
- Chill before serving: Allow the bars to chill in the refrigerator for at least 4 hours (or overnight) for best flavor and texture.
- Garnish just before serving: If using whipped cream or chocolate shavings as toppings, add them right before serving to keep them fresh and visually appealing.
Best Side Dishes for Black Forest Cheesecake Bars
Pairing side dishes with your Black Forest Cheesecake Bars can elevate your dessert experience. Here are some delicious options to consider.
- Fresh Fruit Salad: A light fruit salad with seasonal fruits adds refreshing contrasts to the rich cheesecake.
- Chocolate Mousse: A small portion of chocolate mousse complements the flavors beautifully without overwhelming them.
- Coffee or Espresso: A cup of coffee or espresso enhances the chocolate notes and provides a nice balance to the sweetness.
- Vanilla Bean Ice Cream: The creamy texture of vanilla bean ice cream pairs wonderfully with these bars, creating a decadent treat.
- Berry Compote: A warm berry compote adds tartness that contrasts nicely with the sweet cheesecake.
- Nutty Granola Parfait: Layering granola with yogurt and berries creates a crunchy side that works well with dessert flavors.
- Cheese Platter: Offer a selection of cheeses like brie or goat cheese for guests who enjoy savory bites alongside their sweet treats.
- Spiced Nuts: Serve spiced nuts as an optional snack that can provide a crunchy contrast to the soft cheesecake bars.
Common Mistakes to Avoid
Baking these Black Forest Cheesecake Bars can be a delightful experience, but there are common pitfalls to watch out for.
- Boldly skipping the crust prep: Ensure the chocolate cookie crumbs are properly combined with melted butter and sugar. This creates a solid base that holds everything together.
- Ignoring room temperature ingredients: Using cold cream cheese or eggs can lead to lumps in your cheesecake. Always let them sit out for about 30 minutes before mixing.
- Overmixing the cheesecake batter: Overmixing can introduce too much air, which causes cracks while baking. Mix just until combined for a smooth texture.
- Not checking for doneness: Relying solely on time can be misleading. Check for a slight jiggle in the center of the cheesecake as an indicator of doneness.
- Skipping refrigeration time: Allowing the bars to cool completely before slicing is crucial. This sets the layers properly and makes for cleaner cuts.
Storage & Reheating Instructions
Refrigerator Storage
- Store Black Forest Cheesecake Bars in an airtight container.
- They will keep well for up to 5 days in the fridge.
Freezing Black Forest Cheesecake Bars
- Wrap individual pieces tightly in plastic wrap and then store them in a freezer-safe container.
- They can be frozen for up to 3 months; just ensure they are well-wrapped to prevent freezer burn.
Reheating Black Forest Cheesecake Bars
- Oven: Preheat to 350°F (175°C). Warm bars on a baking sheet for about 10-15 minutes until slightly warm.
- Microwave: Heat individual pieces on a microwave-safe plate for 15-20 seconds. Be cautious not to overheat, as that can change the texture.
- Stovetop: Use a non-stick pan over low heat. Warm bars gently, flipping them occasionally until heated through.
Frequently Asked Questions
Here are some common questions about making Black Forest Cheesecake Bars.
Can I use different fruit toppings on my Black Forest Cheesecake Bars?
Yes! You can substitute cherry pie filling with other fruit options like blueberries or raspberries, depending on your preference.
How do I know when my Black Forest Cheesecake Bars are done baking?
Look for a slight jiggle in the center of the cheesecake. It should not be completely firm, as it will set as it cools.
Can I make Black Forest Cheesecake Bars ahead of time?
Absolutely! These bars can be made a day or two in advance and stored in the refrigerator until you’re ready to serve.
What’s the best way to cut Black Forest Cheesecake Bars?
For clean cuts, use a sharp knife dipped in hot water. Wipe it clean between each cut for neat slices.
Are there any substitutes for cream cheese in this recipe?
You could use Neufchâtel cheese or a vegan cream cheese alternative if you’re looking for different options.
Final Thoughts
These Black Forest Cheesecake Bars offer a perfect blend of flavors and textures, making them an irresistible treat for any occasion. With simple adjustments, feel free to customize the toppings or even experiment with different crusts. Try this recipe and enjoy creating your own delicious variations!
Print
Black Forest Cheesecake Bars
- Total Time: about 4 hours
Description
These rich and creamy Black Forest Cheesecake Bars combine a chocolate cookie crust, smooth vanilla cheesecake filling, and sweet cherry topping. Inspired by the classic flavors of Black Forest cake, these bars are perfect for parties, holidays, or whenever you crave a decadent chocolate-cherry dessert.
Ingredients
For the Crust:
1 1/2 cups chocolate cookie crumbs (such as Oreo, without filling)
1/4 cup unsalted butter, melted
2 tablespoons granulated sugar
For the Cheesecake Filling:
16 oz cream cheese, softened
1/2 cup granulated sugar
2 large eggs
1 teaspoon vanilla extract
1/4 cup sour cream
Pinch of salt
For the Topping:
1 can (21 oz) cherry pie filling
Optional: dark chocolate shavings or curls
Optional: whipped cream
Instructions
- Preheat oven to 325°F (160°C). Line a 9×9-inch baking pan with parchment paper, leaving an overhang for easy removal.
- In a bowl, mix chocolate cookie crumbs, melted butter, and sugar until combined. Press firmly into the bottom of the prepared pan.
- Bake the crust for 8–10 minutes. Remove and let cool slightly.
- In a large bowl, beat cream cheese and sugar until smooth and creamy.
- Add eggs one at a time, mixing just until combined.
- Mix in vanilla extract, sour cream, and salt until smooth. Do not overmix.
- Pour the cheesecake filling over the cooled crust and spread evenly.
- Bake for 35–40 minutes, or until the center is set but slightly jiggly.
- Cool completely at room temperature, then refrigerate for at least 3 hours (or overnight) to firm up.
- Once chilled, spread cherry pie filling evenly over the top. Garnish with chocolate shavings or whipped cream if desired.
- Lift out using parchment, slice into bars, and serve.
- Prep Time: 20 minutes
- Cook Time: 40 minutes