
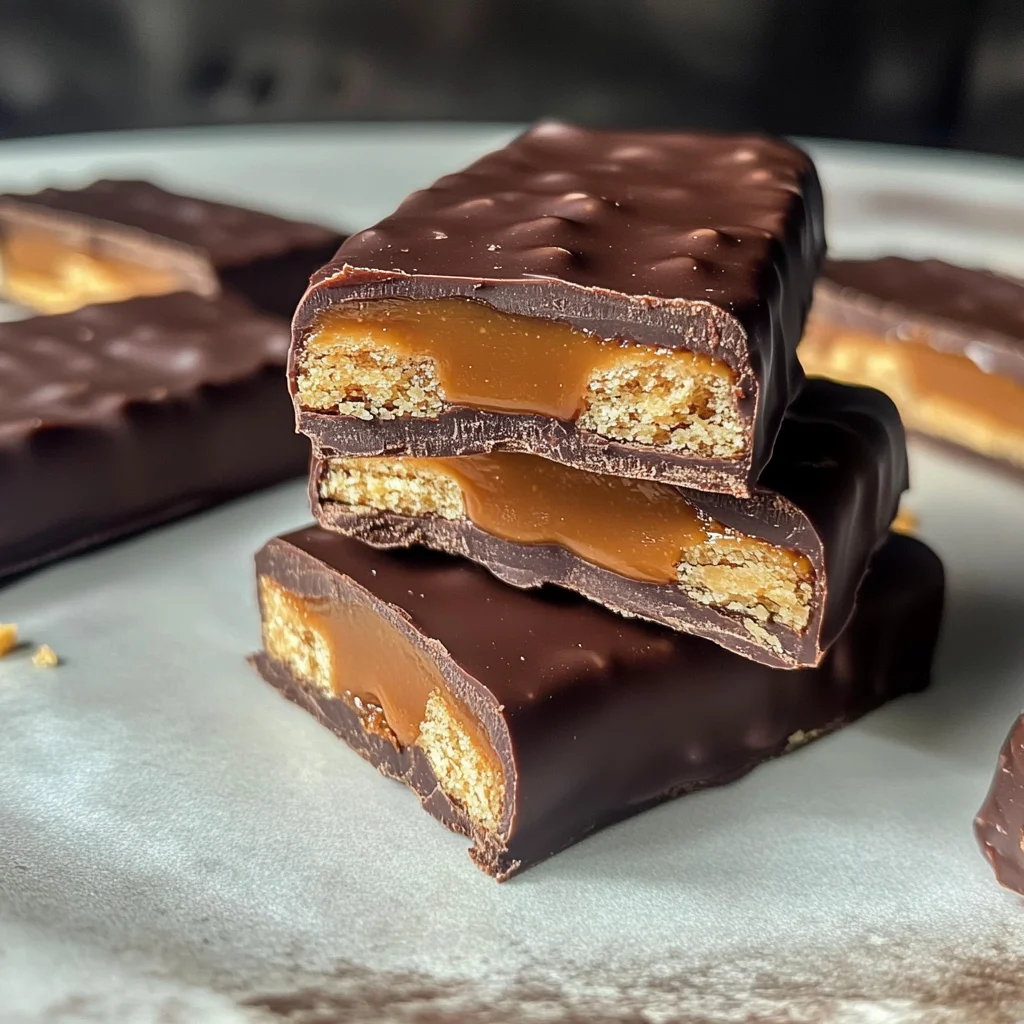
Satisfy your sweet tooth with these Healthy Twix Bars (Gluten-free) Homemade Recipe! These delicious bars are perfect for any occasion, whether it’s a family gathering, a snack for the kids, or a personal treat after a long day. Made from wholesome ingredients and gluten-free, they provide a satisfying combination of flavors and textures that will leave you craving more. Enjoy the rich taste of chocolate and creamy peanut butter without compromising on health!
Why You’ll Love This Recipe
- Easy to Make: With simple steps and readily available ingredients, you’ll have these bars ready in no time.
- Wholesome Ingredients: Each ingredient is chosen to provide flavor without sacrificing nutrition.
- Versatile Treat: Great for dessert, snacks, or meal prepping. Perfect for any time of day!
- Gluten-Free Option: Safe for those avoiding gluten while still being delightful.
- Customizable: Feel free to add nuts or dried fruits for extra texture and flavor.
Tools and Preparation
Before diving into this fantastic recipe, gather your kitchen tools. Having everything at hand will make your baking experience smoother.
Essential Tools and Equipment
- 8×8 inch baking pan
- Parchment paper
- Mixing bowls
- Spatula
- Microwave-safe bowl or double boiler
Importance of Each Tool
- Baking Pan: Ensures even baking and easy removal of the bars once cooled.
- Parchment Paper: Helps prevent sticking, making it easy to lift out the shortbread base.
- Mixing Bowls: Allows for efficient mixing of ingredients without mess.
- Spatula: Aids in spreading mixtures evenly in the pan.
Ingredients
For the Shortbread Base
- 1 1/2 cups Almond Flour
- 3 tbsp Butter (melted)
- 1 1/2 tbsp Maple Syrup
- 1/2 tsp Vanilla Extract
- 1/4 tsp Salt
For the Caramel Filling
- 1 cup Creamy Peanut Butter
- 1/3 cup Maple Syrup
- 1 tsp Vanilla Extract
- 1/4 cup Almond Flour
For the Chocolate Coating
- 1 cup Chocolate Chips
- 1 1/2 tbsp Coconut Oil
How to Make Healthy Twix Bars (Gluten-free) Homemade Recipe
Step 1: Preheat the Oven
Preheat your oven to 350°F (175°C). Line an 8×8 inch baking pan with parchment paper, ensuring the edges are well covered. This step is crucial for easy removal of the shortbread base later.
Step 2: Prepare the Shortbread
In a large mixing bowl, combine the almond flour, melted butter, maple syrup, vanilla extract, and salt. Stir until all ingredients are fully incorporated, forming a dough.
* Press this mixture firmly into the prepared baking pan.
* Bake for 10-12 minutes until golden brown on the edges.
Set aside to cool while preparing the caramel filling.
Step 3: Make the Caramel Filling
In another medium bowl, mix together peanut butter, maple syrup, vanilla extract, and almond flour until smooth.
Once the shortbread has cooled:
* Spread this caramel mixture evenly over the top.
* Place in the freezer for at least 1 hour to set.
Step 4: Prepare the Chocolate Coating
After chilling, melt chocolate chips and coconut oil together in a microwave-safe bowl or using a double boiler until smooth.
If using a microwave:
* Microwave in 30-second intervals, stirring between each session.
Step 5: Assemble the Bars
Remove from freezer and lift out using parchment paper.
Place on a cutting board:
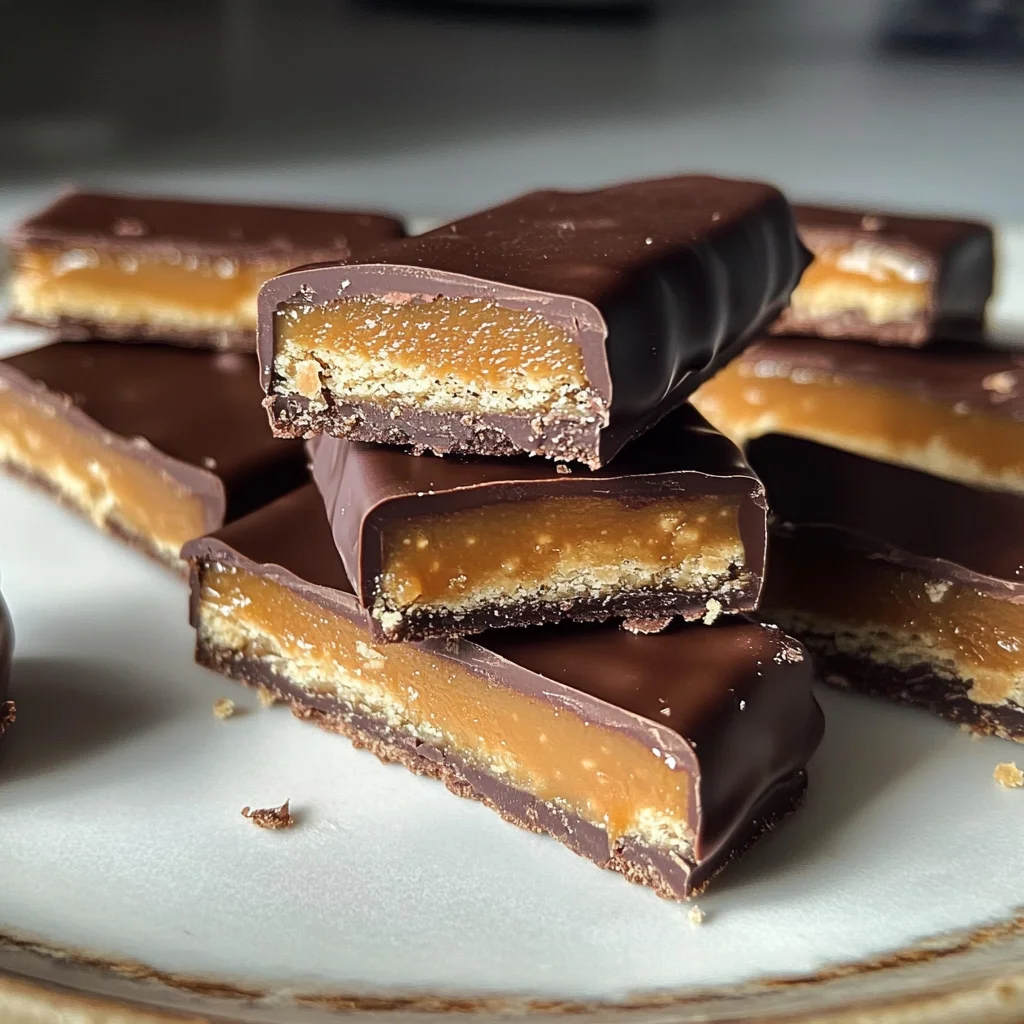
* Slice into 16 bars (cut in half once and then slice each half into eight).
Step 6: Coat the Bars
Dip each bar into melted chocolate:
* Ensure each is fully covered.
Gently tap off excess chocolate and place on a parchment-lined tray. Repeat for all bars.
Step 7: Final Touch
Optionally drizzle remaining melted chocolate over bars:
Sprinkle with flaky sea salt if desired. Return tray to freezer for about 10 minutes to allow chocolate to harden.
Step 8: Enjoy!
These homemade healthy Twix bars are ready to be savored! Store any leftovers in an air-tight container in either fridge or freezer.
How to Serve Healthy Twix Bars (Gluten-free) Homemade Recipe
These Healthy Twix Bars are not just a delightful treat, but they also make for a versatile dessert option. Whether you’re hosting a gathering or looking for a sweet snack, here are some serving suggestions to enhance your experience.
With Fresh Fruits
- Berries: Serve alongside strawberries, blueberries, or raspberries for a burst of freshness and color.
- Banana Slices: Pair with banana slices for added sweetness and a creamy texture that complements the bars.
As Part of Dessert Platter
- Cheese Plate: Include these bars on a cheese platter with assorted cheeses and nuts for an elegant touch.
- Mini Desserts: Arrange them with other mini desserts like cookie bites or energy balls for variety.
Topped with Whipped Cream
- Coconut Whipped Cream: Serve with a dollop of coconut whipped cream for a dairy-free indulgence.
- Nut Butter Drizzle: Drizzle almond or peanut butter on top for extra richness and flavor.
In Lunchboxes
- Snack Time Treats: Pack these bars in lunchboxes as a healthy dessert option that kids will love.
- Post-Workout Snack: Include them as part of post-workout lunches for a quick energy boost.
How to Perfect Healthy Twix Bars (Gluten-free) Homemade Recipe
To ensure your Healthy Twix Bars turn out perfectly every time, consider these helpful tips that enhance both texture and flavor.
- bold Use Quality Ingredients: Opt for high-quality almond flour and natural nut butters to enhance flavor and nutritional value.
- bold Allow Cooling Time: Make sure the shortbread base is completely cool before adding the caramel layer to prevent melting.
- bold Control Chocolate Temperature: When melting chocolate, avoid overheating to maintain smoothness; stir regularly during melting.
- bold Firm Up in Freezer: After assembling, let the bars set in the freezer long enough so they hold their shape when cut.
- bold Experiment with Flavors: Consider adding different extracts like almond or hazelnut to customize flavors according to your preference.
Best Side Dishes for Healthy Twix Bars (Gluten-free) Homemade Recipe
Pairing your Healthy Twix Bars with complementary side dishes can elevate your dessert experience. Here are some delightful options:
- bold Greek Yogurt Parfait: Layer Greek yogurt with granola and fruits for a creamy contrast.
- bold Fresh Vegetable Sticks: Serve crunchy carrot or cucumber sticks on the side for a refreshing bite that balances sweetness.
- bold Trail Mix: Offer a mix of nuts, seeds, and dried fruits as a savory counterpart to the sweet bars.
- bold Fruit Salad: A light fruit salad can provide additional vitamins and a refreshing palate cleanser.
- bold Nut Butter Dip: Pair with almond or peanut butter dip to enhance flavors while adding protein.
- bold Herbal Tea: A warm cup of herbal tea can complement the sweetness nicely, making it an enjoyable treat experience.
Common Mistakes to Avoid
When making Healthy Twix Bars, it’s easy to run into a few common pitfalls. Here are some mistakes to watch out for.
- Using the wrong pan size: This can lead to uneven baking. Always use an 8×8 inch pan as specified in the recipe for perfect results.
- Not cooling the shortbread properly: If you spread the caramel on a warm shortbread, it will melt. Let the shortbread cool completely before adding the next layer.
- Skipping the parchment paper: Without lining your pan, removing the bars may be difficult. Always line with parchment paper for easy lifting.
- Overheating chocolate: Melting chocolate too quickly can cause it to seize. Use gentle heat methods like a double boiler or microwave at low power.
- Not measuring ingredients accurately: Incorrect measurements can affect texture and taste. Use precise measuring cups and spoons for best results.
Storage & Reheating Instructions
Refrigerator Storage
- item Store Healthy Twix Bars in an airtight container in the fridge for up to 1 week.
- item Ensure each bar is separated by parchment paper to prevent sticking.
Freezing Healthy Twix Bars (gluten-free) Homemade Recipe
- item Wrap each bar individually in plastic wrap and place them in a freezer-safe bag.
- item They can be frozen for up to 3 months without losing flavor or texture.
Reheating Healthy Twix Bars (gluten-free) Homemade Recipe
- Oven: Preheat to 350°F (175°C) and warm bars for about 5-10 minutes until slightly soft.
- Microwave: Heat individual bars on low power for 15-20 seconds; monitor closely to avoid melting.
- Stovetop: Use a skillet on low heat, placing a lid over it for a few minutes until warmed through.
Frequently Asked Questions
Here are some frequently asked questions about Healthy Twix Bars.
How do I make Healthy Twix Bars (gluten-free) homemade recipe vegan?
You can substitute butter with coconut oil or a plant-based alternative, and ensure all other ingredients are vegan-friendly.
Can I use different nut flours instead of almond flour?
Yes, other nut flours like cashew or hazelnut flour can be used, but they may alter the flavor slightly.
How long do Healthy Twix Bars (gluten-free) homemade recipe last?
These bars last about one week in the refrigerator or up to three months if frozen properly.
Can I customize my Healthy Twix Bars (gluten-free) homemade recipe?
Absolutely! Feel free to add nuts, seeds, or dried fruits into the caramel layer for extra flavor and texture.
What type of chocolate should I use?
Choose dark chocolate chips that are dairy-free for a healthy option, or use your favorite variety that fits your dietary preferences.
Final Thoughts
Healthy Twix Bars are not only delicious but also versatile. You can easily customize them with your favorite nuts or sweeteners. These gluten-free treats make for perfect snacks or desserts that everyone will enjoy. Give this recipe a try and delight in a healthier twist on a classic treat!

Healthy Twix Bars (Gluten-free) Homemade Recipe
- Total Time: 32 minutes
- Yield: Makes approximately 16 bars 1x
Description
Satisfy your sweet cravings with these Healthy Twix Bars (Gluten-free) Homemade Recipe! These delightful treats combine a rich shortbread base, creamy peanut butter caramel, and a luscious chocolate coating, all while being gluten-free and made from wholesome ingredients. Perfect for any occasion—whether it’s a family gathering or a personal snack—each bite offers a satisfying blend of flavors and textures. With easy preparation and customizable options, you can enjoy a guilt-free dessert that doesn’t compromise on taste. Indulge in the heartwarming combination of chocolate and peanut butter, and treat yourself to a healthier twist on a classic favorite!
Ingredients
- 1 1/2 cups Almond Flour
- 3 tbsp Butter (or coconut oil for vegan, melted)
- 1 1/2 tbsp Maple Syrup
- 1/2 tsp Vanilla Extract
- 1/4 tsp Salt
- 1 cup Creamy Peanut Butter
- 1/3 cup Maple Syrup
- 1 tsp Vanilla Extract
- 1/4 cup Almond Flour
- 1 cup Chocolate Chips
- 1 1/2 tbsp Coconut Oil
Instructions
- Preheat your oven to 350°F (175°C) and line an 8×8 inch baking pan with parchment paper.
- In a mixing bowl, combine 1 1/2 cups almond flour, 3 tbsp melted butter (or coconut oil), 1 1/2 tbsp maple syrup, 1/2 tsp vanilla extract, and 1/4 tsp salt. Mix until it forms dough.
- Press the mixture into the prepared pan and bake for 10-12 minutes until golden brown. Cool completely.
- For caramel filling, mix together 1 cup creamy peanut butter, 1/3 cup maple syrup, 1 tsp vanilla extract, and 1/4 cup almond flour until smooth. Spread over cooled shortbread and freeze for at least an hour.
- Melt together 1 cup chocolate chips and 1 1/2 tbsp coconut oil until smooth. Dip each bar into the melted chocolate and place on parchment-lined tray.
- Optionally drizzle leftover chocolate over bars and sprinkle with sea salt before freezing again for about 10 minutes.
- Prep Time: 20 minutes
- Cook Time: 12 minutes
- Category: Dessert
- Method: Baking
- Cuisine: American
Nutrition
- Serving Size: 1 bar (35g)
- Calories: 160
- Sugar: 7g
- Sodium: 30mg
- Fat: 10g
- Saturated Fat: 3g
- Unsaturated Fat: 7g
- Trans Fat: 0g
- Carbohydrates: 12g
- Fiber: 2g
- Protein: 4g
- Cholesterol: 10mg